
How to Turn a 3D Model of a Modern House into a Complete Visual Presentation
Learn how to use RenderChat and prompts to guide AI design workflows for realistic rendering, material adjustments, multiple views, lighting and atmosphere testing, and architectural animation.
Why Use a Conversational Workflow for AI Architectural Rendering?
AI rendering becomes harder to control when too many requirements are packed into one long prompt. The model may change elements that should stay the same or ignore some instructions.
RenderChat makes the process more like a design conversation. You can start by turning a 3D model into a realistic render, then adjust materials, explore new viewpoints, and test different lighting conditions step by step.
By focusing on one change at a time, it becomes easier to keep the design consistent and refine the final result.
Step 1 — Log in to RenderChat
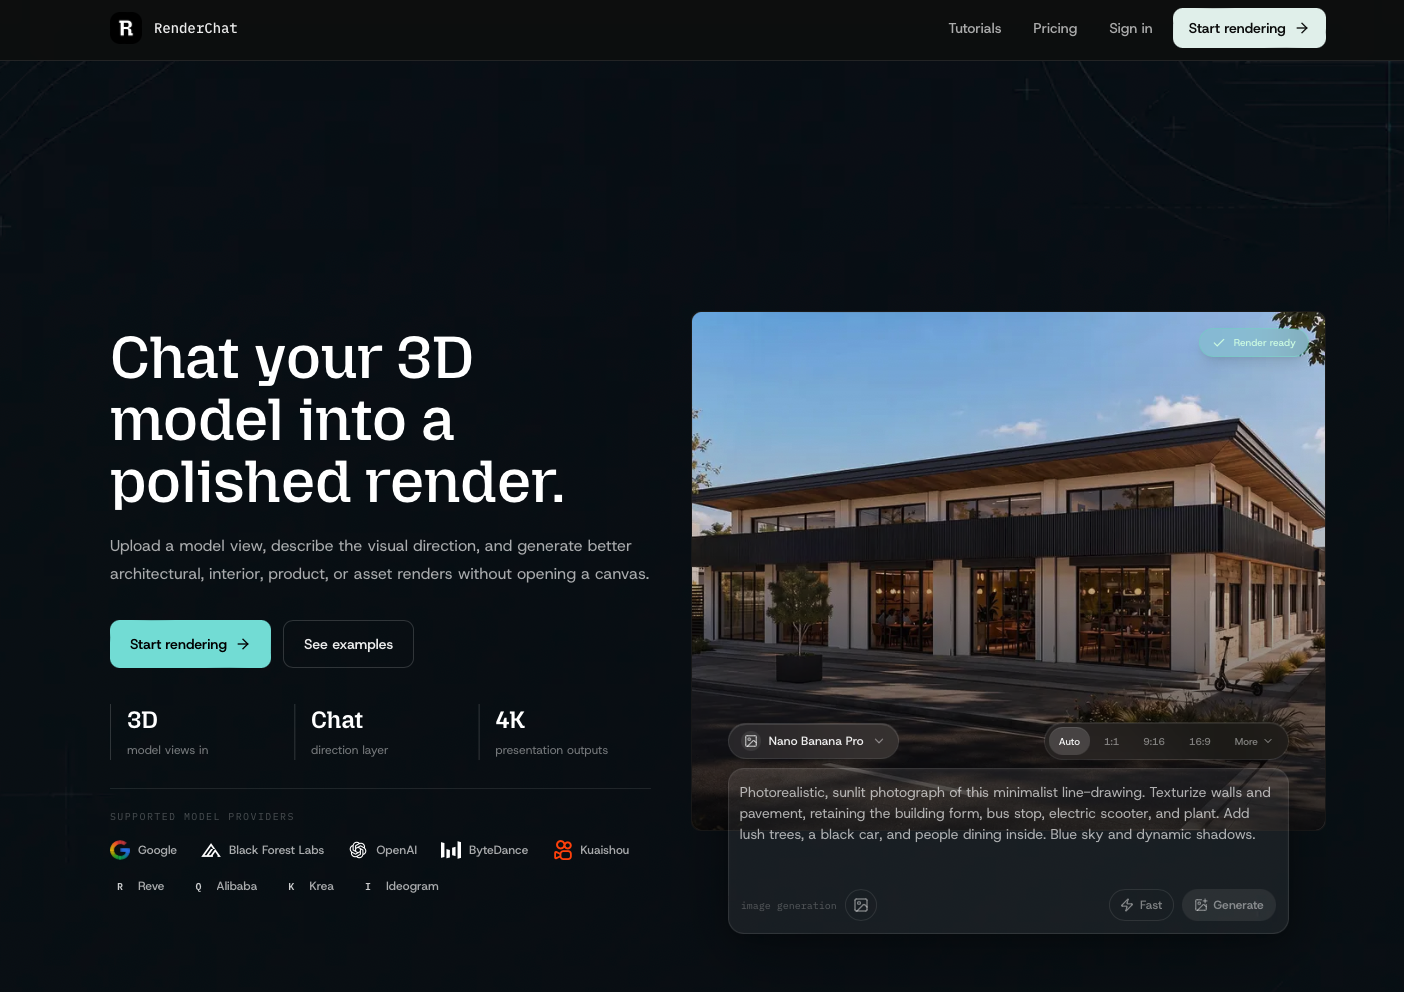
First, log in to RenderChat and start a new chat.
This will be the workspace where you upload your 3D model image and continue refining the same design through each step, from realistic rendering to material changes, different viewpoints, lighting, and animation.
Step 1 — Turn the 3D Model into a Realistic Architectural Render
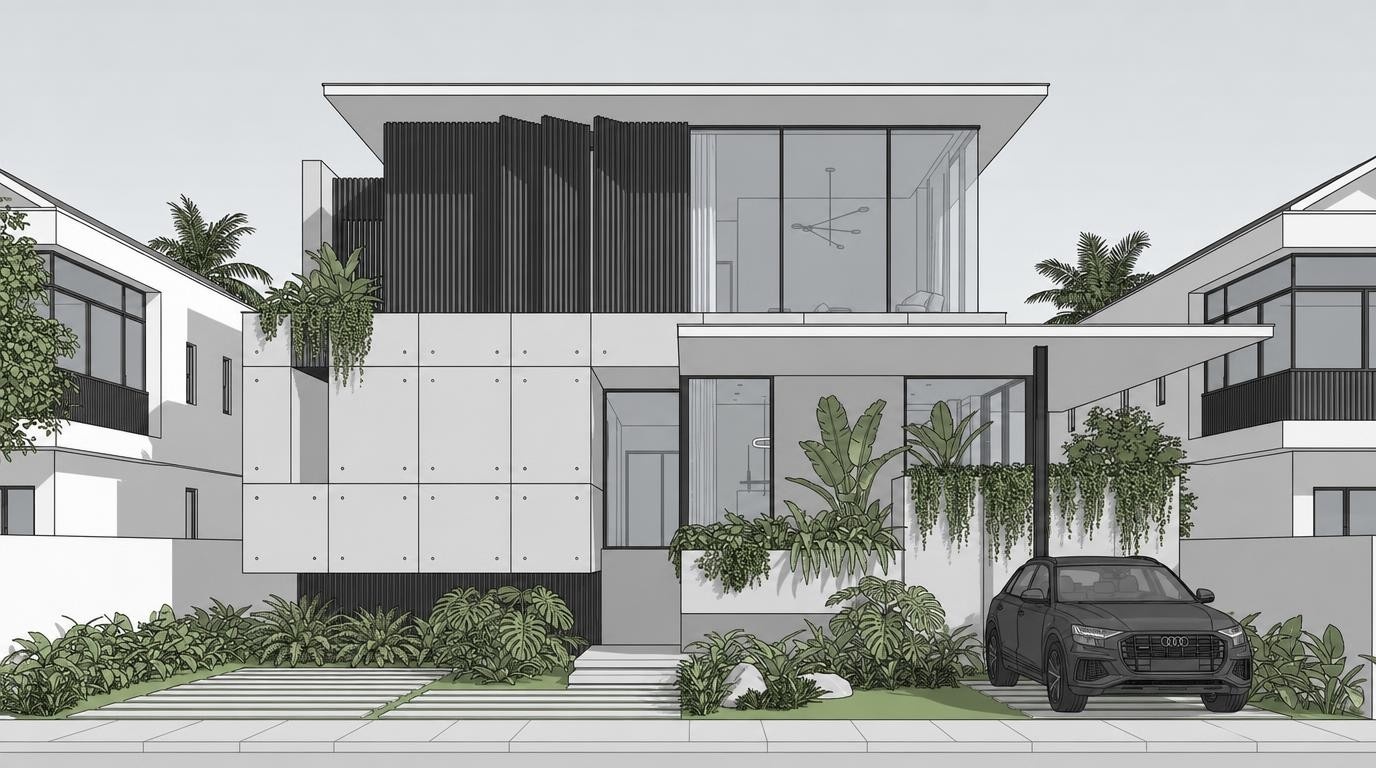
In the first step, we upload the original residential 3D model image to RenderChat.
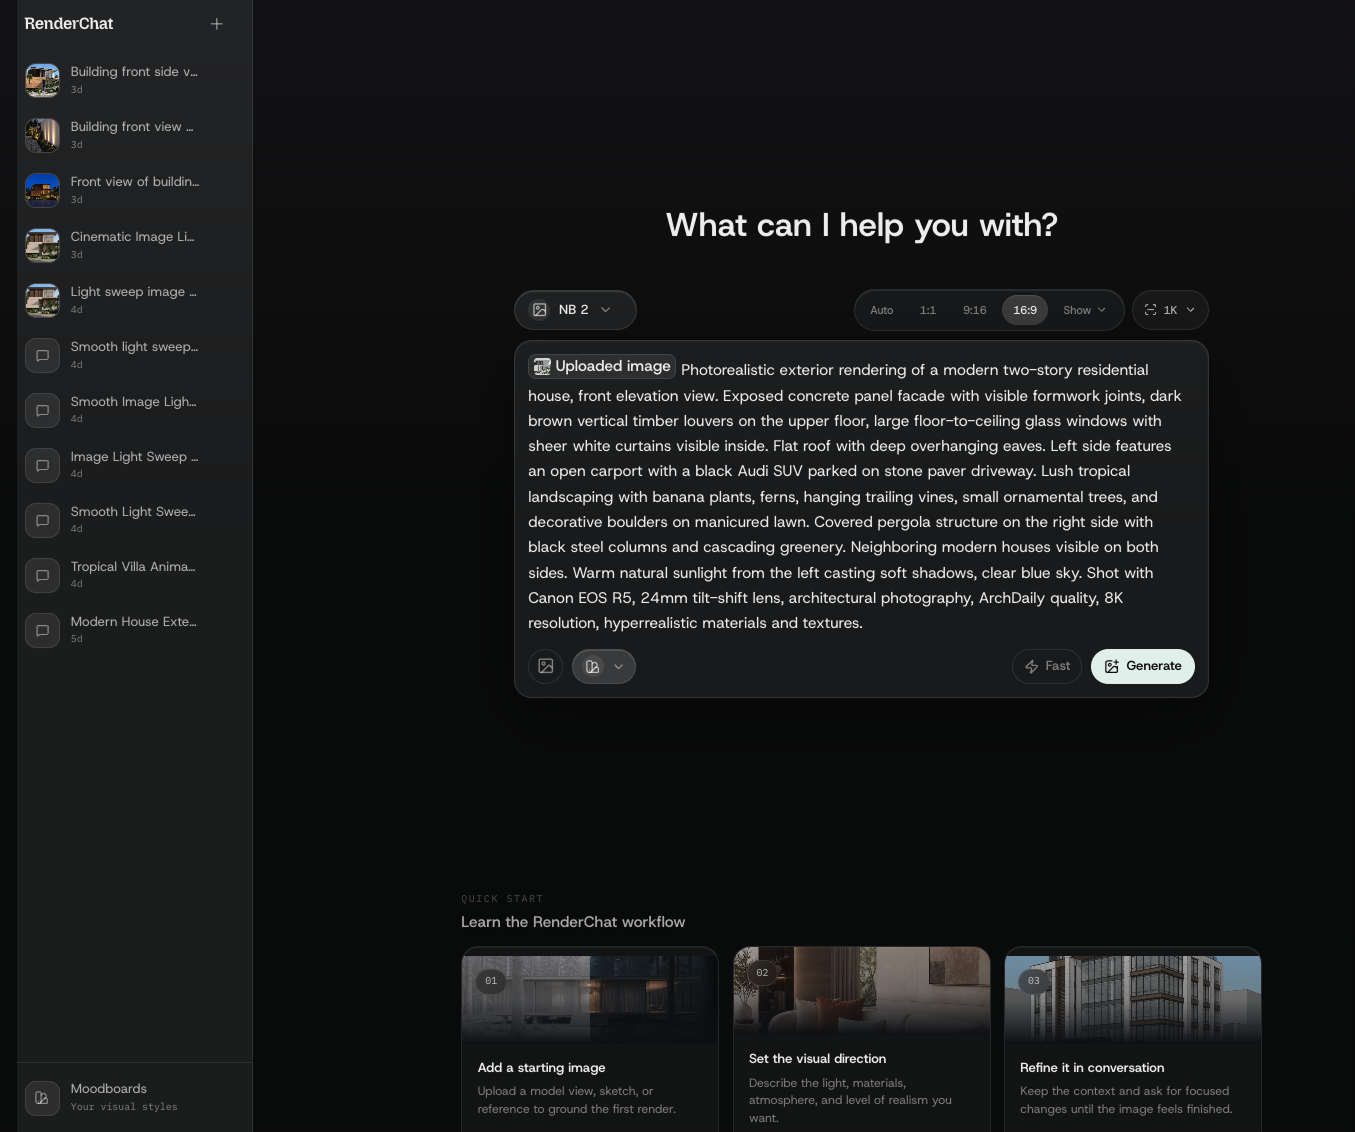
This image already contains the basic building massing, windows, carport, landscaping, and facade proportions, but it still looks closer to a model or an early-stage design image.
At this stage, there is no need to refine the materials first.
Instead, we can directly ask the AI to transform the model into a realistic architectural rendering while preserving the original building design and viewpoint. The goal is to generate an image with realistic materials, landscaping, and natural lighting.
For example:
Photorealistic exterior rendering of a modern two-story residential house, front elevation view. Exposed concrete panel facade with visible formwork joints, dark brown vertical timber louvers on the upper floor, large floor-to-ceiling glass windows with sheer white curtains visible inside. Flat roof with deep overhanging eaves. Left side features an open carport with a black Audi SUV parked on stone paver driveway. Lush tropical landscaping with banana plants, ferns, hanging trailing vines, small ornamental trees, and decorative boulders on manicured lawn. Covered pergola structure on the right side with black steel columns and cascading greenery. Neighboring modern houses visible on both sides. Warm natural sunlight from the left casting soft shadows, clear blue sky. Shot with Canon EOS R5, 24mm tilt-shift lens, architectural photography, ArchDaily quality, 8K resolution, hyperrealistic materials and textures.
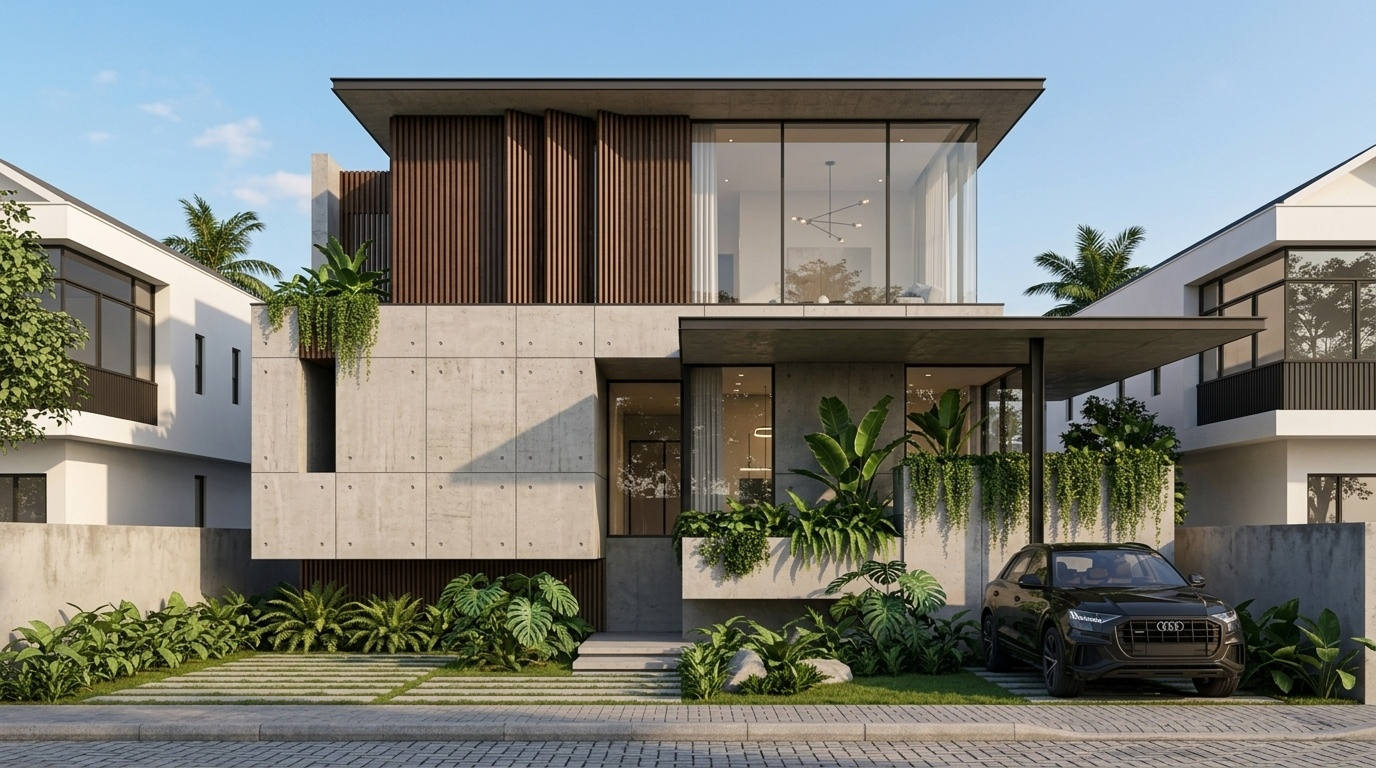
Figure 01. Starting from the original residential 3D model image, RenderChat transforms the model into a realistic architectural rendering.
Step 2 — Adjust Materials Through Conversation Without Regenerating the Entire Building
Next, we want to test a different facade material.
For example, the ground floor on the left originally uses exposed concrete, but we want to see how the house would look with a warmer natural wood finish instead.
There is no need to describe the entire building again.
In the same RenderChat conversation, we can simply tell the AI what material we want to change:
The ground floor left facade features warm natural wood cladding panels with horizontal grain texture, seamlessly transitioning into the dark brown vertical timber louvers on the upper floor.
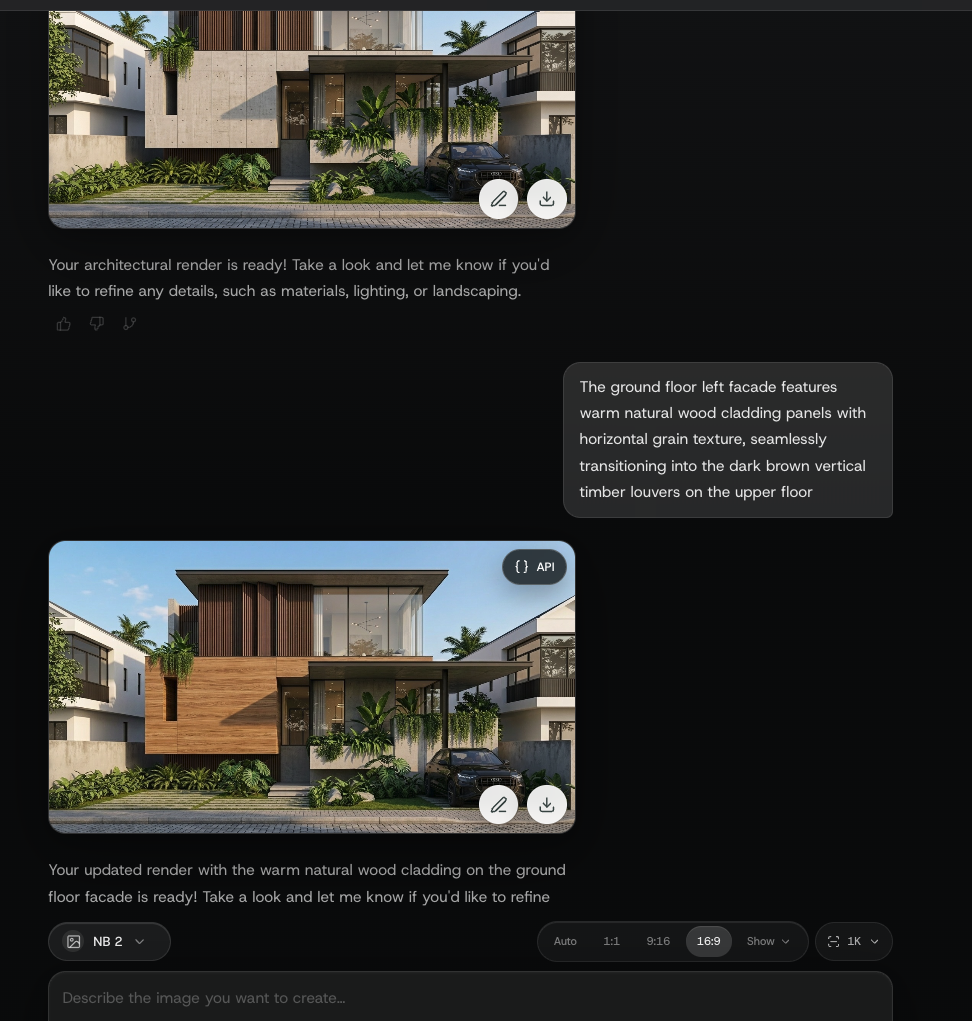
Figure 02. In the same RenderChat conversation, only the selected facade material is changed while the rest of the building design remains consistent.
Step 3 — Generate New Architectural Views from a Single Render
Once the material direction is confirmed, the next common question is:
What if we only have one front view, but need more angles for the presentation?
In the past, without a complete 3D model, it was often difficult to create additional architectural viewpoints directly.
Now, we can use the completed render and let RenderChat infer another reasonable view of the same building.
For example:
Generate a view of this residence from the angle indicated by the black arrow, while strictly preserving the original architectural form, materials, proportions, and design language. Do not redesign or modify the residence.
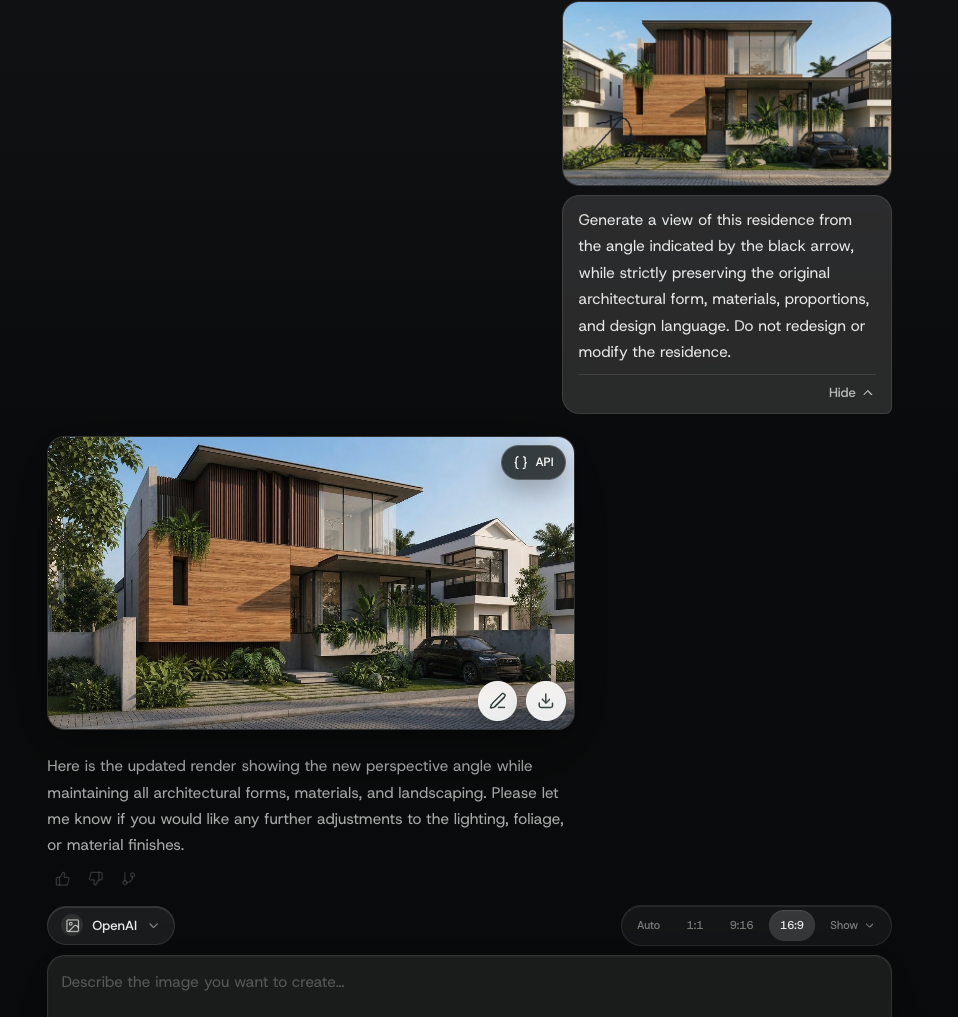
Figure 03. Generate a new architectural viewpoint from an existing render while preserving the original design language.
Step 4 — Use Multiple Reference Images to Quickly Test Lighting and Atmosphere
Once the building design is established, we can continue exploring different times of day and visual moods.
For example, after completing a daytime render, we may want to see how the residence would look at dusk or during blue hour.
To do this, we can provide multiple reference images at the same time:
- one as the building and material reference
- one as the lighting reference
- one as the atmosphere reference
Then we can directly tell RenderChat what role each image should play.
Use Image 2 as the lighting reference, and Image 3 as the reference for dusk atmosphere and mood.
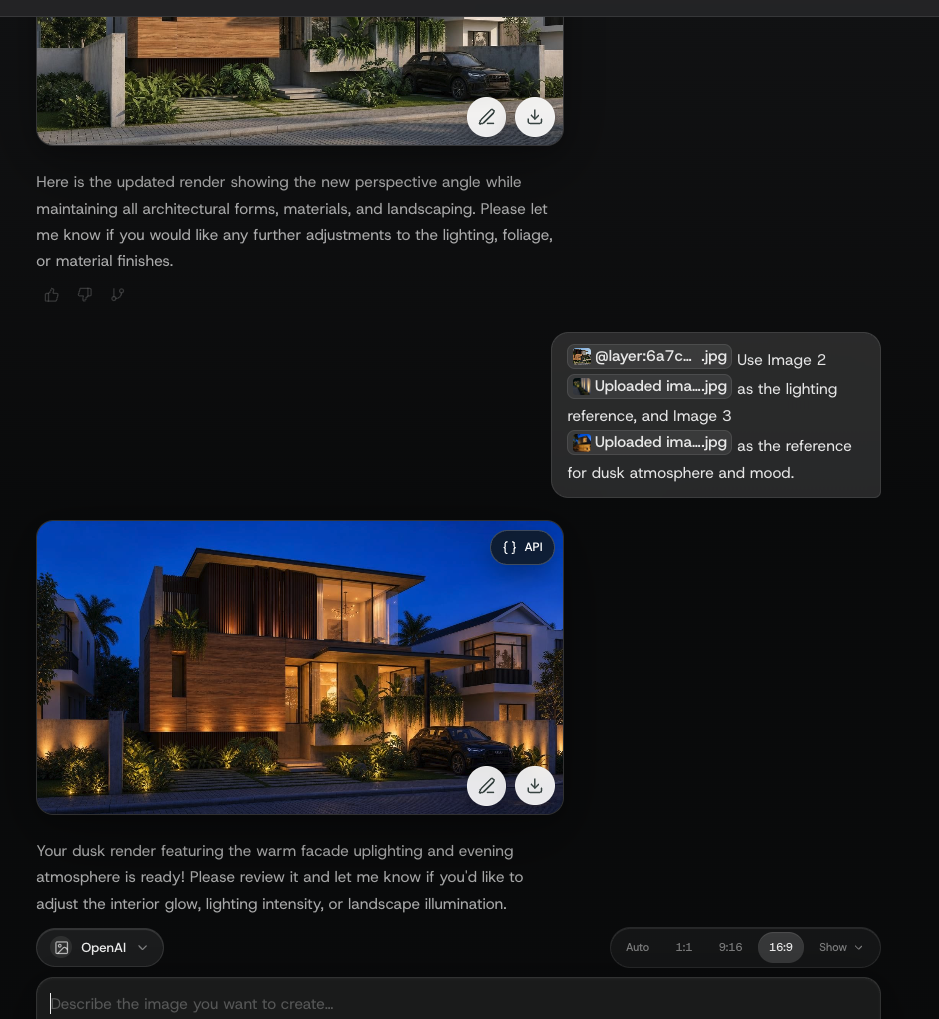
Figure 04. Use multiple reference images to separately control the building, materials, lighting, and dusk atmosphere.
Step 5 — Turn the Final Render into an Architectural Animation
After completing the static render, we can take the final image one step further and turn it into an architectural animation.
At this stage, the focus shifts from:
“What should the building look like?”
to:
“How should the camera move?”
For example, if we want the camera to slowly move toward the building, we can use:
Slow cinematic zoom-in toward the front facade of the building, camera gradually moves closer, steady and smooth dolly forward motion, architectural cinematography, golden hour lighting.
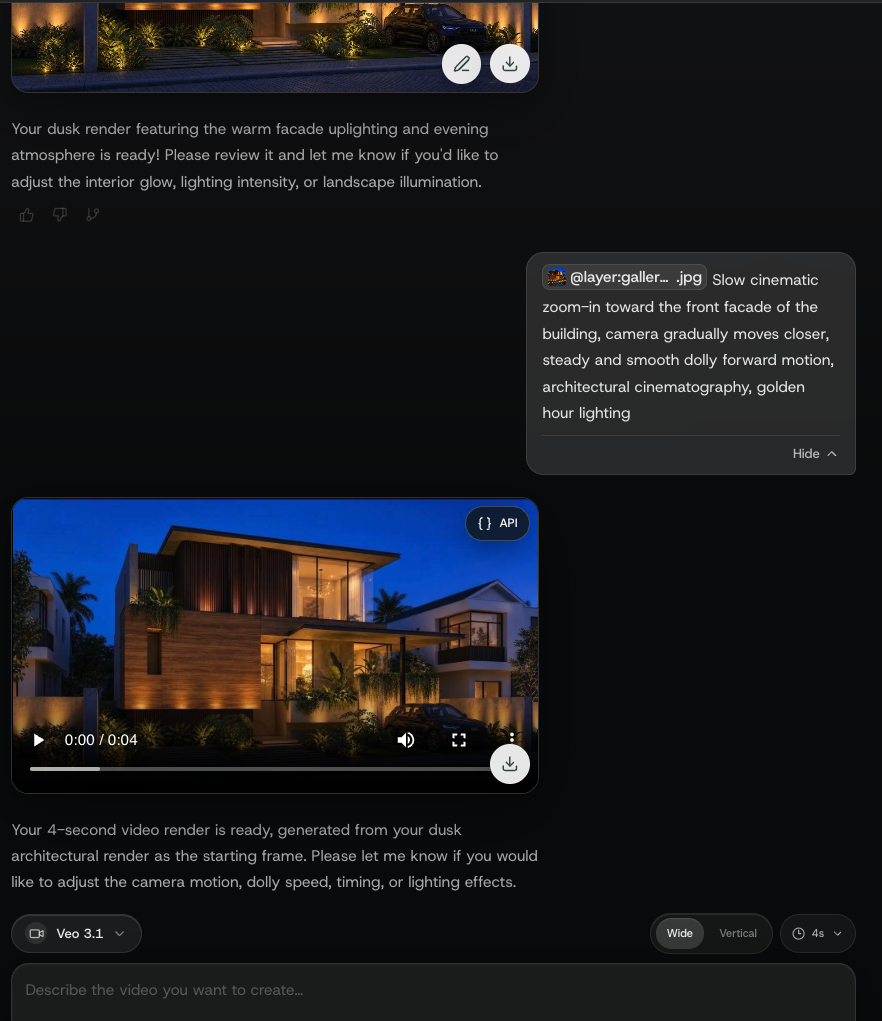
Figure 05. Turn the final architectural render into a video by using a simple prompt to control the camera movement.
Final Thoughts
With RenderChat, the workflow can move naturally from a simple 3D model to a complete architectural visual presentation.
Instead of trying to control everything in one long prompt, we can refine the design step by step—first creating a realistic render, then adjusting materials, exploring new viewpoints, testing different lighting conditions, and finally turning the image into an architectural animation.
The key is to treat AI as part of an ongoing design conversation. By making one clear change at a time while preserving what already works, it becomes easier to maintain consistency and develop a more complete visual direction from a single starting image.
Bu içerik yardımcı oldu mu?